My Own Gallery Wall
 |
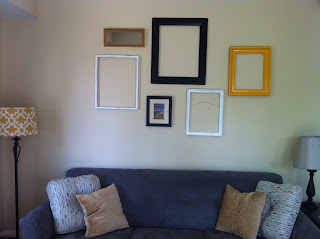
| Final Gallery Wall Image |
At a garage sale that weekend I kept my eyes open for picture frames and found a dusty stack right away. The guy was so desperate to get rid of them he gave them to me for FREE! That is my kind of deal.
Now that I had my frames I needed help picturing what this could look like over my couch. I began laying out different designs on the floor next to my couch. By doing this I was able to identify what colors I needed to paint each frame. I also realized that I needed to throw in a few accent pieces which I found in my apartment. Helpful tip: Remember to take a photo of your design so you can replicate it again when you are ready to hang!
 |
| Set-Up before painting |
Next step was straight to the hardware store to pick out some spray paint, I ended up with white and marigold to match my living room colors. Make sure you get spray paint that can be used on wood. Both cans were $5 a piece and I will be able to use them both for many more projects. You will also need a plastic tarp to spray paint on and some sandpaper if you want to distress any pieces when you are finished.
After 3 coats of paint and time to dry I decided to distress one of the frames and keep the others as is. Now all I had to do was refer to my photo that I took previously to get the spacing and set-up that I had originally decided on.
Last step was to hang them up! What I love most about this project is that I can continue to add pieces when I find them but in the meantime I finally have something hanging over my couch.


Comments
Post a Comment